System requirements
| COMPONENT | APPOINTMENT | MINIMUM | STANDARD |
|---|---|---|---|
| Server hardware | Server (workstation) for the installing software |
|
|
| MoEx RSA certificates | Certificates (keys) for the channel with NSD EDI | Certificate issued by the Moscow Exchange Certificate Authority | Certificate issued by the Moscow Exchange Certificate Authority |
| Server Software | Software installed on the server |
|
|
| Client workstation software | Software needed on the client side to work with Transit Terminal | Browser Google Chrome or Microsoft EDGE | Browser Google Chrome or Microsoft EDGE |
Install on Windows
Install and setup the following software sequentially:
- PostgreSQL.
- CryptoPS.
- iGate.
- Transit Terminal.
NOTE: CryptoPS and iGate must be installed on a single server. Installation on multiple servers is supported for other software, but we recommend installing all the software on one server.
NOTE: Install and run the software under the same user.
PostgreSQL installation and setup
Download link: https://www.enterprisedb.com/downloads/postgres-postgresql-downloads.
Documentation: https://www.enterprisedb.com/docs/supported-open-source/postgresql/installer/.
-
Download and run the installation file. In the Password step, set the password for the PostrgeSQL user. Choose default settings on all the other installation steps.
-
Once the installation is complete the Setup window opens. Clear the Launch Stack Builder checkbox and click Finish.
-
Find and launch pgAdmin 4 via the Windows search box.
-
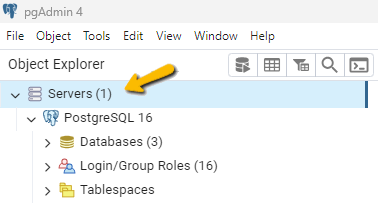
In the Object Explorer tree in the left pane, click Servers. In the opened Connect to Server window, enter PostrgeSQL user password.
-
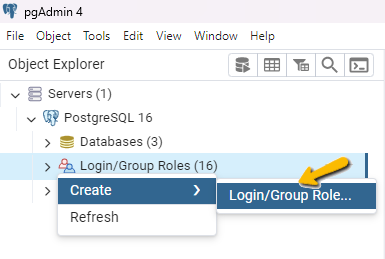
Create an additional user for iGate databases. To do this, in the Object Explorer tree in the left pane, right-click on Login/Group Roles, then select Create → Login/Group Role.
In the opened window specify:- General tab. Name — set user name, for example, igate_user.
- Definition tab. Password — set password. Do not use special characters.
- Privileges tab. Click the Can login toggle to the on position.
-
Click Save.
-
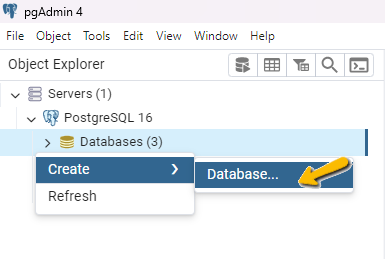
Create a database for iGate. To do this, in the Object Explorer tree in the left pane, right-click on Databases, then select Create → Database.
In the opened window specify:- General tab:
- Database — set the database name, for example, igate_db.
- Owner — select the user you created earlier.
- Definition tab:
- Tablespace — select pg_default.
- Collation and Character type — select the UTF-8 database localization.
- Privileges tab:
- Click the Can login toggle to the on position.
- General tab:
-
Click Save.
CryptoPS installation and setup
Download link: https://fs.moex.com/cdp/po/MOEX_EDI_CryptoPS_v60_64bit.zip.
Documentation: https://fs.moex.com/cdp/po/MOEX_EDI_CryptoPS_Doc.zip.
MOEX RSA Cryptography page: https://www.moex.com/s1293.
NOTE: CryptoPS and iGate must be installed on the same server.
-
Place the electronic signature certificate on the machine where CryptoPS will be installed. Test environment certificates are provided by NSD technical support service, production environment certificates are provided by Moscow Exchange Certificate Authority.
-
Download and run the installation file. In the Select installation type step, click Complete.
-
Find and launch Certificate Store via the Windows search box.
-
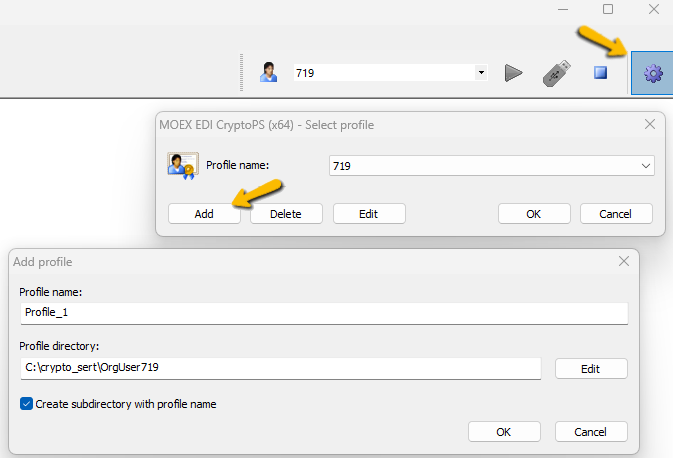
On the Certificate Store control panel, click Profile Settings, then click Add.
-
In the opened Add Profile window, specify:
- Profile name — set the profile name. We recommend naming it by the name of the key.
- Profile directory — select the folder with the certificate.
-
Click OK. New settings appear:
- Personal store — select the certificate PSE file on your device.
- Local store — select the certificate GDBM file on your device.
-
Click OK → OK. Error loading key for certificate appears.
-
Ignore the error and click OK. In the opened Select file window, find and select the certificate RSA file on your device.
-
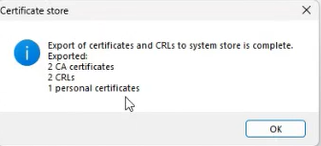
In the Certificate Store menu, select Service → Export certificates to system store.
-
Click Yes on the security warnings. The number of exported certificates will be shown.
-
Make sure that the Load profile control panel button is disabled. It means that the profile is running.
-
Close Certificate store.
WARNING: To avoid conflicts, the Certificate store should be closed when iGate is running.
iGate installation and setup
Download link: https://www.nsd.ru/upload/docs/edo/po/igate-en-86.0.0.390.zip.
Product page: https://www.nsd.ru/workflow/system/programs.
-
Download and run the installation file. In the first installation step, click Options and select the Install as a service checkbox.
-
Complete the installation and launch NSD Integration Gateway via the Windows search box.
-
On the NSD Integration Gateway control panel, click Settings.
In the opened Settings window, on the DB settings tab, specify:
- Database provider — select PostgreSQL.
- Host name — PostrgeSQL database address.
- Port — 5432.
- Database — enter the database name that was created in pgAdmin 4.
- Username and Password — enter the credentials of the user that was created in pgAdmin 4.
-
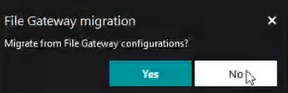
Click Connect to DB. In the opened File Gateway Migration window, click No.
-
In the Settings window, click Ok to save changes.
-
Open the Settings window again. On the Web API Server tab, specify:
- Use Web API Server — check the checkbox.
- Server IP address — enter the iGate DNS name or IP address. Type localhost, if Transit Terminal will be installed on the same server as iGate.
- Server port — 8088.
-
In the Settings window, click Ok to save the changes.
-
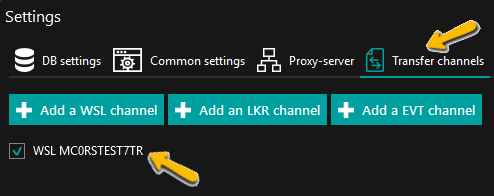
Open the Settings window, and on the Transfer channels tab, click Add a WSL channel. In the opened Configure WSL channel window, specify:
- Channel name, Channel code, Deponent code — enter your deponent code in all three fields. Test environment certificates are provided by NSD technical support service, production environment certificates are provided by Moscow Exchange Certificate Authority.
- Transit 2.0 — select the checkbox.
- WSL service endpoint — specify the WSL service endpoint provided by Moscow Exchange Certificate Authority.
- Cryptography mode — select RSA.
- Cryptography profile — select the profile that was created in the CryptoPS.
- Client certificate serial code — at the end of the field, click Select certificate, then in the opened window, select the CryptoPS certificate.
- Use directories — clear the checkbox.
-
Click OK — make sure that the new channel appears in the Settings window on the Transfer channels tab.
-
Click OK in the Settings window.
-
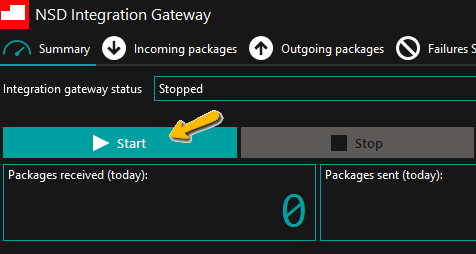
On the NSD Integration Gateway control panel, click Start to start the created channel.
Transit Terminal installation and setup
Download link: https://www.nsd.ru/upload/docs/multibank/nsdt-en-us.msi.
Documentation link: https://www.nsd.ru/upload/docs/multibank/doc.zip.
Product page: https://www.nsd.ru/po-multibank/.
-
Download and run the installation file: nsdt-en-us.msi.
-
In the Database connectivity settings installation step, specify:
- Server address — enter the PostgreSQL server address. Type localhost, if PostgreSQL is installed on the same server as the Transit Terminal.
- Port — 5432.
- Database name — set a new Transit Terminal database name. The database will be created automatically during the installation.
- User name, Password — enter the PostgreSQL user credentials you created earlier. You can also use PostgreSQL superuser credentials.
-
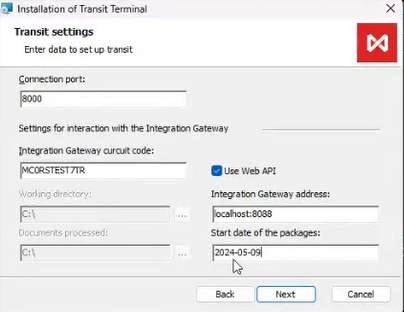
In the Transit settings step, specify:
- Connection port — 8000.
- Integration Gateway circuit code — enter your deponent code.
- Use Web API — select the checkbox.
- Integration Gateway address — enter the iGate address and 8088 port. For example, localhost:8088.
- Start date of the packages — enter yesterday’s date in the following format yyyy-mm-dd. For example, 2025-05-29.
-
Click Next and then Finish to complete the installation.